New Hampshire Dept. of Corrections
Corrections Special School District
Career & Technical Education Center
Corrections Special School District
Career & Technical Education Center
Website Development I
Course Info
Class Notes
Resources
Student Websites
Class No. 11:


Creating Tables
Today’s Goal
To explore the capabilities of HTML tables and the parameters that control their display.
Class Resources
Web Programming book reading for THIS class
- pages 168-194
- Introduction
- Table Elements
- Formatting a Data Table: Borders, Alignment, and Padding
- CSS Structural Pseudo-Class Selectors
theadandtbodyElements- Cell Spanning
- Web Accessibility
- CSS display Property with Table Values
Web Programming book reading for NEXT class
- pages 152-155
- Child Selectors
- CSS Inheritance
Preambles
Collect Mid-Course Evaluation forms
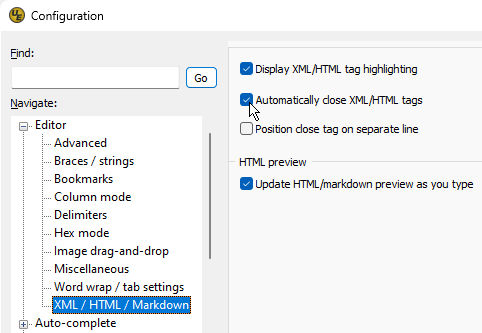
A few UltraEdit tricks
- To turn off UltraEdit’s automatic closing of tags:
- in the horizontal menu at the top of the window, click Advanced
- click Settings to bring up Configuration dialog box
- in the Configure group, expand the
Editor section by clicking the
+ sign next to Editor (if necessary) - under Navigate, click XML / HTML / Markdown
- at the right, uncheck
- To change UltraEdit’s theme to colored text on a white background:
- in the horizontal menu at the top of the window, click Layout
- in the Look and feel group, click Themes to bring up a dropdown menu
- click Classic
- To change UltraEdit’s font size:
- hold down the Ctrl key and twirl your mouse wheel to increase or decrease the font size

Questions from our last class or the readings?
Basic Table Tags
<table> =container object<thead> =first line of table<tfoot> =last line of table<tbody> =organizer<th> =column heading<tr> =table row<td> =table cell
Basic Table Attributes
cellpadding =space betwen cell contents and cell boundarycellspacing =space between cell boundariesalign =alignment of contents within a cellcolspan =number of columns that a specific cell spansrowspan =number of rows that a specific cell spans
Example: List of Class Topics
1 <table> 2 <thead><strong>Tentative Class Topic Schedule</strong></thead> 3 <tr> 4 <td>1. </td> 5 <td>Tuesday,</td> 6 <td>Apr.</td> 7 <td>4</td> 8 <td>:</td> 9 <td>HTML Markup for Basic Text</td> 10 </tr> 11 <tr> 12 <td>2. </td> 13 <td>Thursday,</td> 14 <td>Apr.</td> 15 <td>6</td> 16 <td>:</td> 17 <td>HTML Structure & More Basic Markup</td> 18 </tr> 19 <tr> 20 <td>3. </td> 21 <td>Tuesday,</td> 22 <td>Apr.</td> 23 <td>11</td> 24 <td>:</td> 25 <td>Introduction to Cascading Style Sheets</td> 26 </tr> 27 </table>
- With the program running in your browser, type CtrlU to see its source code
Example: Spanning Columns
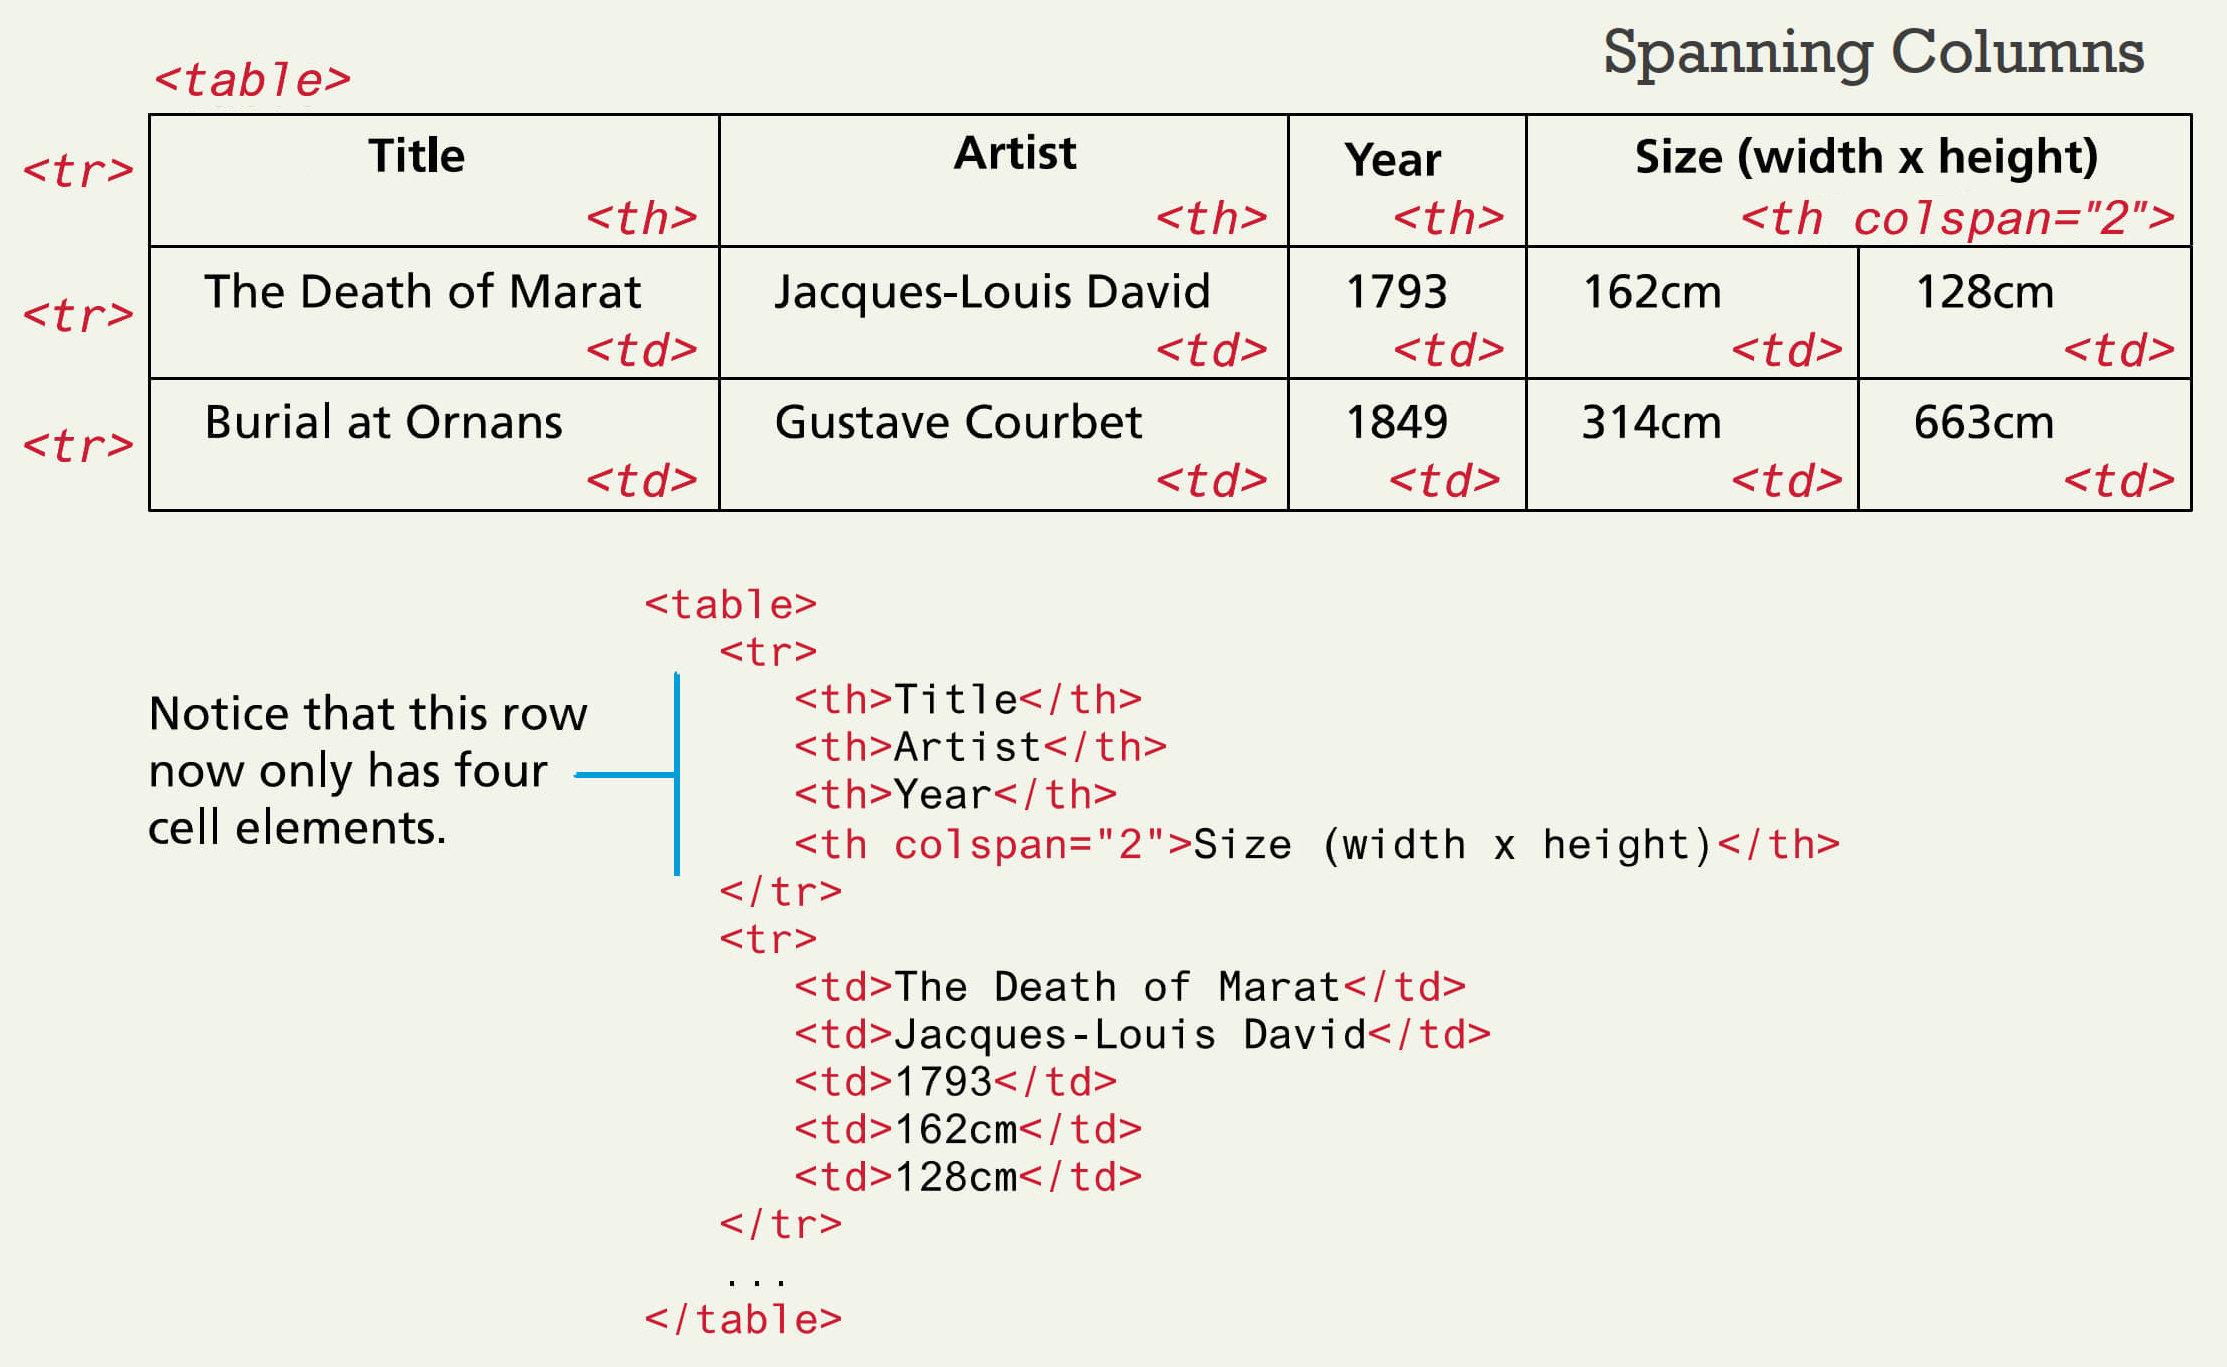
Source: Connolly & Hoar (2018), Fundamentals of Web Development, Figure 5.4, page 174, slide 7 for Chapter 5
Today’s Exercise
Goal: To create a web page that incorporates an HTML table.
Procedure:
- Start by closely examining page 25 or page 36 of the PRO Manual and noticing how the table is laid out on the page.
- Choose one of these pages to work on.
- Create the basic structure of your page without the table.
- Now begin to add the table. Work slowly, adding just the tags for the first
row and get that row looking as you want it to before moving on to the second
row. Make sure that you indent the
<tr>and<td>tags properly according to the table tag hierarchy. (See the examples above.) - Add the second and third rows. Test your work in the browser. Again, make sure that the first three rows all look as you want them to before going on.
- Finish up the table and check that it displays properly.
- If you chose to work on page 36, see if you can figure out how to get the table to appear to the right of the “Property Pick Up” text as it does in the PRO Manual.
- As always, if you need help with any aspect of this exercise, call me over to your work station.
This is Class No. 11. It was last modified on
Saturday, October 21, 2023 at 4:38 PM. Copyright © 2010-2026 by Jesse M. Heines. All rights reserved, but may be freely copied or excerpted for
educational purposes with credit to the author.