Corrections Special School District
Career & Technical Education Center
Website Development I
Class No. 1:


HTML Markup for Basic Text
Introductions
These notes are at under the Class Notes tab
- if the text is too small, hold down the Ctrl key and twirl your mouse wheel to zoom in
- alternatively, use Ctrl+ to zoom in and Ctrl– to zoom out
- use Ctrl0 (zero) to return to the default size (no zoom)
Course Goal
- to learn the basic concepts involved in website development through programming
Course Approach
- topic introductions through class discussion
- excercises involving putting various pages of the PRO Manual online
Course Philosophy
- write code instead of using code writers to help you fully understand what’s going on “under the hood”
- learn terms and concepts that apply to computer science as a whole
- take a “shotgun” approach, that is, providing exposure to various topics rather than exploring any one topic in great depth
- stress professional coding practices and approaches
- provide structured exercises for each class, but give you as much freedom as possible to create web pages on topics that interest you
Course Textbook
- Web Programming with HTML5, CSS, and JavaScript by John Dean
- virtually all of the material we cover is also be covered in this book
- all assigned readings will be in this book
See the for more details.
Today’s Goal
To create a HTML page that runs on our server.
Class Resources
Web Programming book reading for THIS class
- Chapter 1: Introduction to Web Programming, pages 2-15
- Introduction
- Creating a Website
- Web Page Example
- HTML Tags
- Structural Elements
titleElementmetaElement- HTML Attributes
bodyElements:hr, p, br, div
Web Programming book reading for NEXT class
- Chapter 2: Coding Standards, Block Elements, and Text Elements, pages 34-46
- Introduction
- HTML Coding Conventions
- Comments
- HTML Elements Should Describe Web Page Content Accurately
- Content Model Categories
- Block Elements
blockquoteElement- Whitespace Collapsing
preElement
In your folders
- HTML5 CheatSheet #2 (PDF) – simplified
- HTML5 CheatSheet #1 (PDF) – extensive
For today’s exercise
- HTML5 Code Template (starter file that you will modify)
- PRO Manual (PDF from which you can copy text)
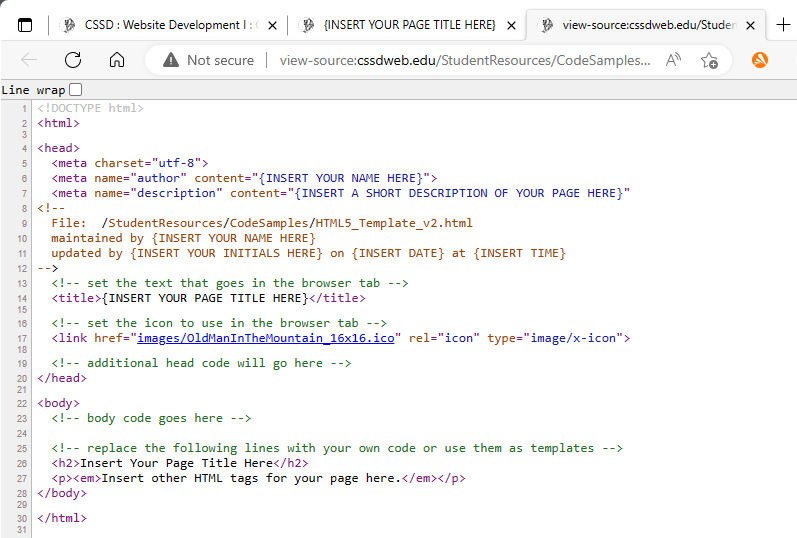
HTML5 Code Template
This is the code that we will work with today. It will also be useful to you in future classes.
We will first discuss what’s here and then you’ll have the opportunity to create a web page using this code as a starting point.
This code is similar to the code in figures 1.4 and 1.5 on page 9 of your textbook, and the discussion of that code on pages 9-15 is directly relevant today’s class discussion.
 1  <!DOCTYPE html>
 2  <html>
 3
 4  <head>
 5    <meta charset="utf-8">
 6    <meta name="author" content="{INSERT YOUR NAME HERE}">
 7    <meta name="description" content="{INSERT A SHORT DESCRIPTION OF YOUR PAGE HERE}"
 8  <!--
 9    File:  /StudentResources/CodeSamples/HTML5_Template_v2.html
10    maintained by {INSERT YOUR NAME HERE}
11    updated by {INSERT YOUR INITIALS HERE} on {INSERT DATE} at {INSERT TIME}
12  -->
13    <!-- set the text that goes in the browser tab -->
14    <title>{INSERT YOUR PAGE TITLE HERE}</title>
15
16    <!-- set the icon to use in the browser tab -->
17    <link href="images/OldManInTheMountain_16x16.ico" rel="icon" type="image/x-icon">
18
19    <!-- additional head code will go here -->
20  </head>
21
22  <body>
23    <!-- body code goes here -->
24
25    <!-- replace the following lines with your own code or use them as templates -->
26    <h2>Insert Your Page Title Here</h2>
27    <p><em>Insert other HTML tags for your page here.</em></p>
28  </body>
29
30  </html>
HTML Syntax
Source: Connolly & Hoar, Fundamentals of Web Development
- 2nd ed., Figure 3.3, page 76, and slides for Chapter 3, slide #9
- 3rd ed., Figure 3.4, page 80
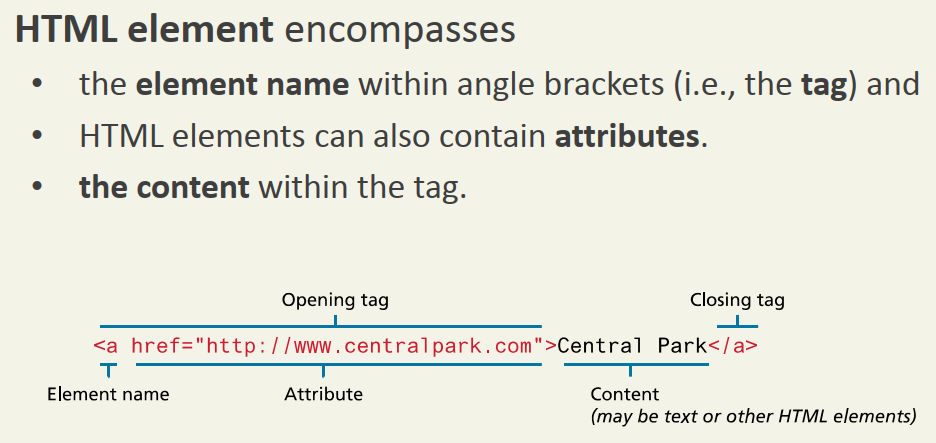
In general, every opening tag must have a corresponding closing tag, but there are exceptions to this rule.
Looking at the HTML5 Template code (please follow along with the handout)
- Note that the file begins with a
DOCTYPEtag that identifies type content of the file as HTML. - Next we see an
<html>opening tag on line 2. This tag begins the section that includes all the other code on the page. Note that the</html>closing tag is the last line of the file, line 32. - The file then has two main sections: the head and the body. Each of these has opening and closing tags. We will learn more about what should go in each and why in later classes.
- I have used some other tags to put sample code in both
the
headandbodysections. We’ll talk about those tags after looking at one important structural consideration: nesting.
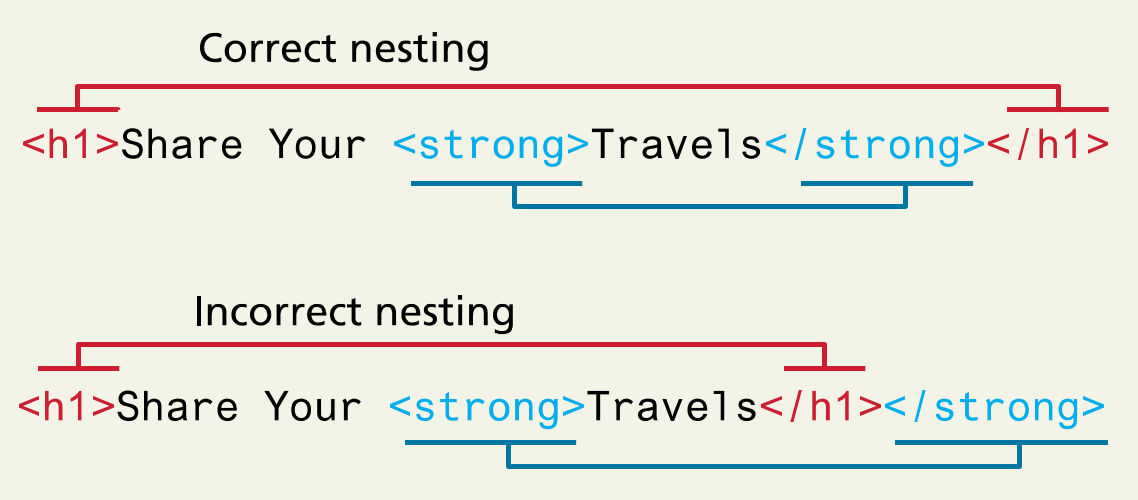
Nesting
Source: Connolly & Hoar, Fundamentals of Web Development
- 2nd ed., Figure 3.5, page 78, and slides for Chapter 3, slides #11 & #12
- 3rd ed., Figure 3.6, page 81
HTML Markup Tags
Structural Elements
- we’ve already talked about:
<html>,<head>,<body> - additional structural tags in this file:
<meta>,<title>,<link> - we also see comments:
<!-- ... -->
Remember: In general, every opening tag must have a corresponding closing tag, but there are exceptions to this rule.
Rendering Elements
- header levels:
<h1>,<h2>,<h3>, - paragraphs:
<p>...</p>
Text Formatting Tags
- the
<em>...</em>tag displays text in italics - the
<strong>...</strong>tag displays text in boldface - the
<blockquote>...</blockquote>tag indents a block of text - this technique is used on page 5 of the PRO Manual
These are enough tags to get us started; we’ll explore more in our next class.
Today’s Exercise
Goal: To create a web page for page 4 of the PRO Manual.
Note: I do not expect everyone to complete this entire exercise today. We will continue working on it in our next class, too.
Step 1: Set your File Explorer to display file extensions, not just file names
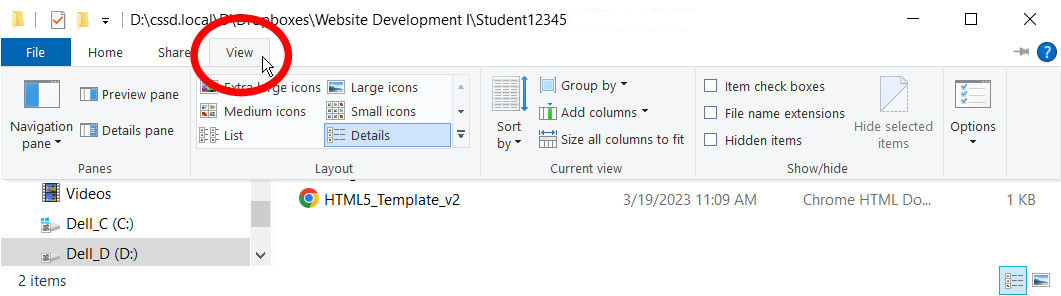
- Open File Explorer. When you first open File Explorer you will be on the Home tab. Notice that you see file names, but your don’t see file extensions because those extensions are hidden.
- Click View to display the drop down View options ribbon.
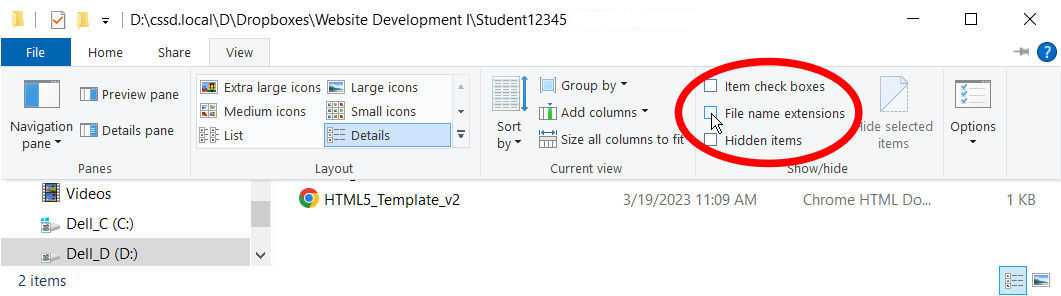
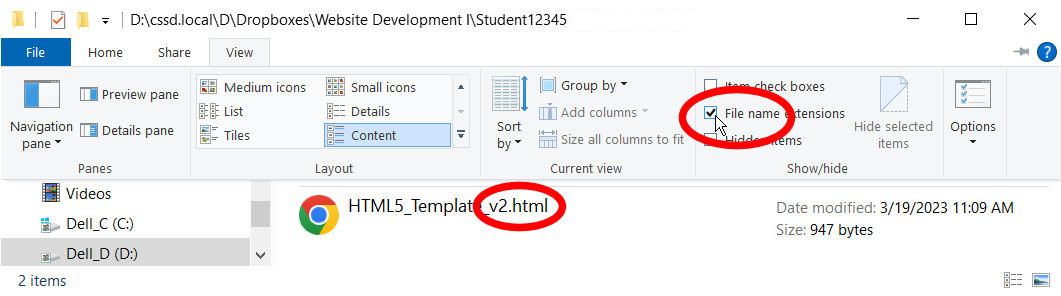
- In the Show/Hide section of the ribbon, click the File name extensions checkbox
- The file extensions — the part after the dot (
.) — should now appear, making it easier to determine each file’s type and to distinguish between files with the same name. - Open the UltraEdit editor on your computer. This should open a blank window that is ready for editing.
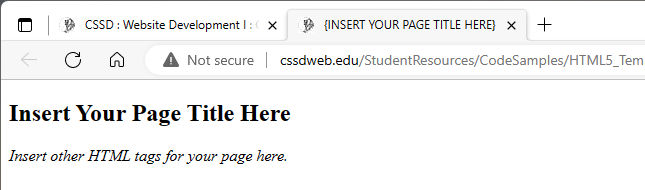
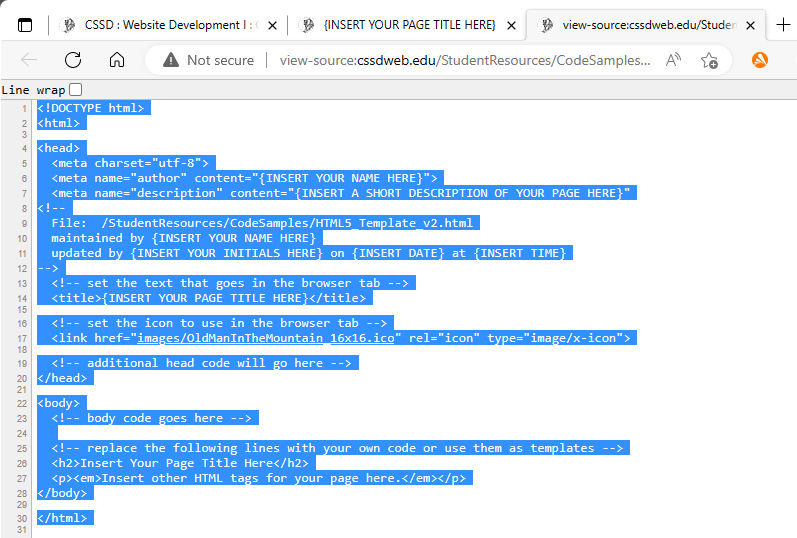
- Leave the editor open and click here to open the HTML5 Template (version 2) in your Microsoft Edge browser.
- Type CtrlU to view the source code for the page.
- Click anywhere in the browser window and type CtrlA to select all of the code.
- Type CtrlC to copy the code.
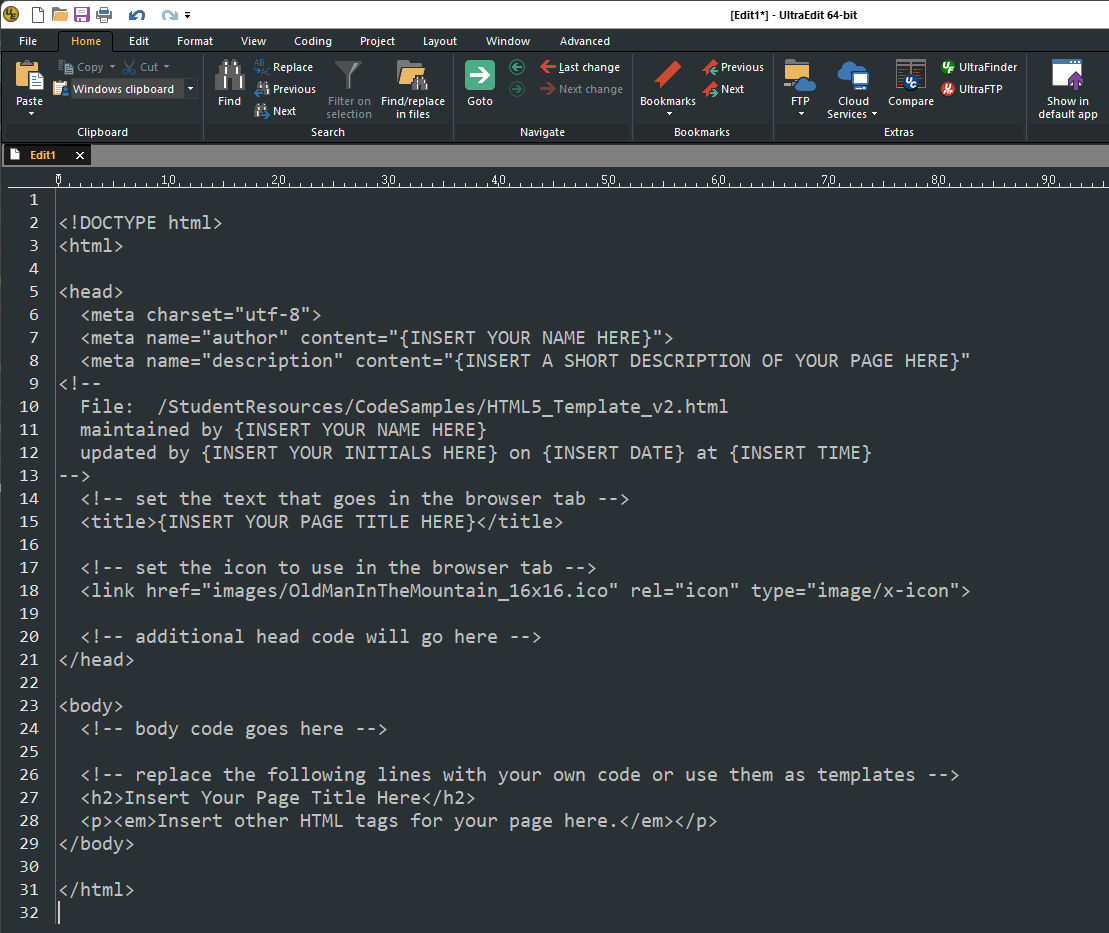
- Return to UltraEdit and type CtrlV to paste the code into the blank editor window.
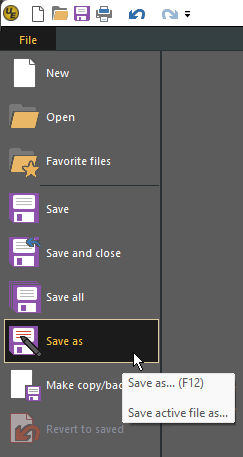
- Click File at the top left of the editor window. A dropdown menu will appear.
- Click Save as. A dialog box will appear.
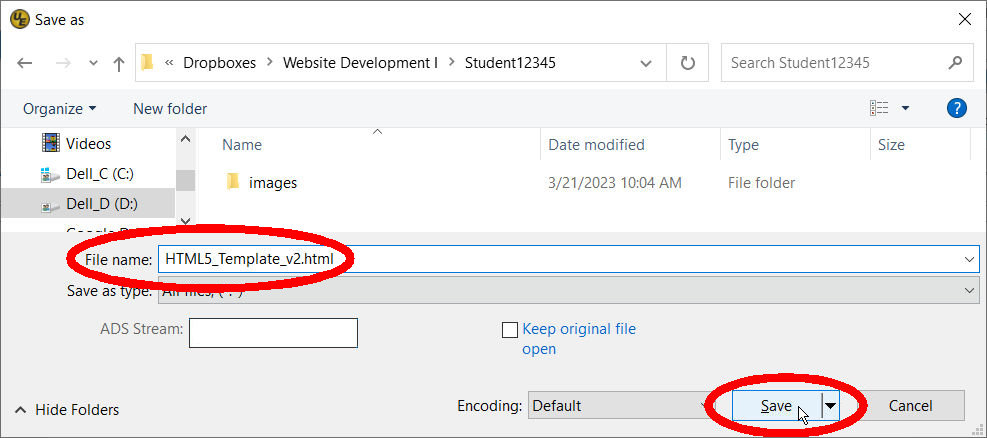
- Once again navigate to your Dropbox (if
necessary). If you do not already have
file
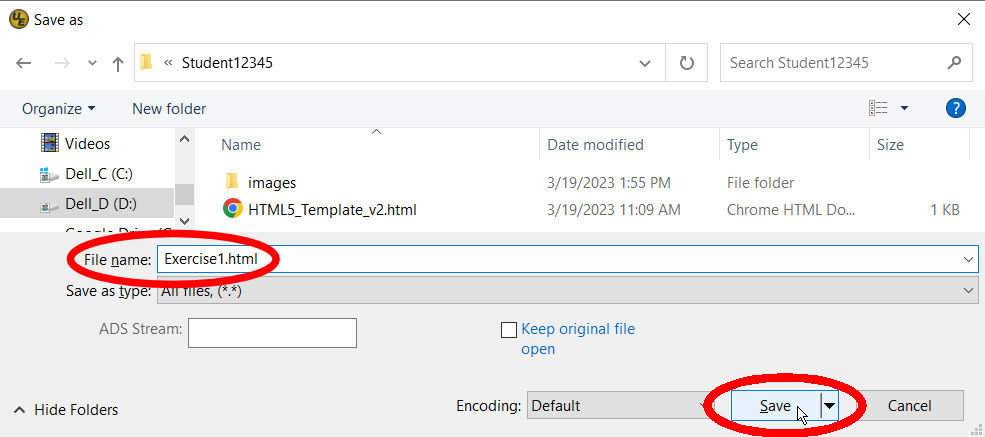
HTML5_Template_v2.htmlin your Dropbox, set the file name toHTML5_Template_v2.htmland click the Save button to save the raw template for future use. Be sure to include.htmlas the file extension! - Click File and then Save As again. This
time, change the file name to something like
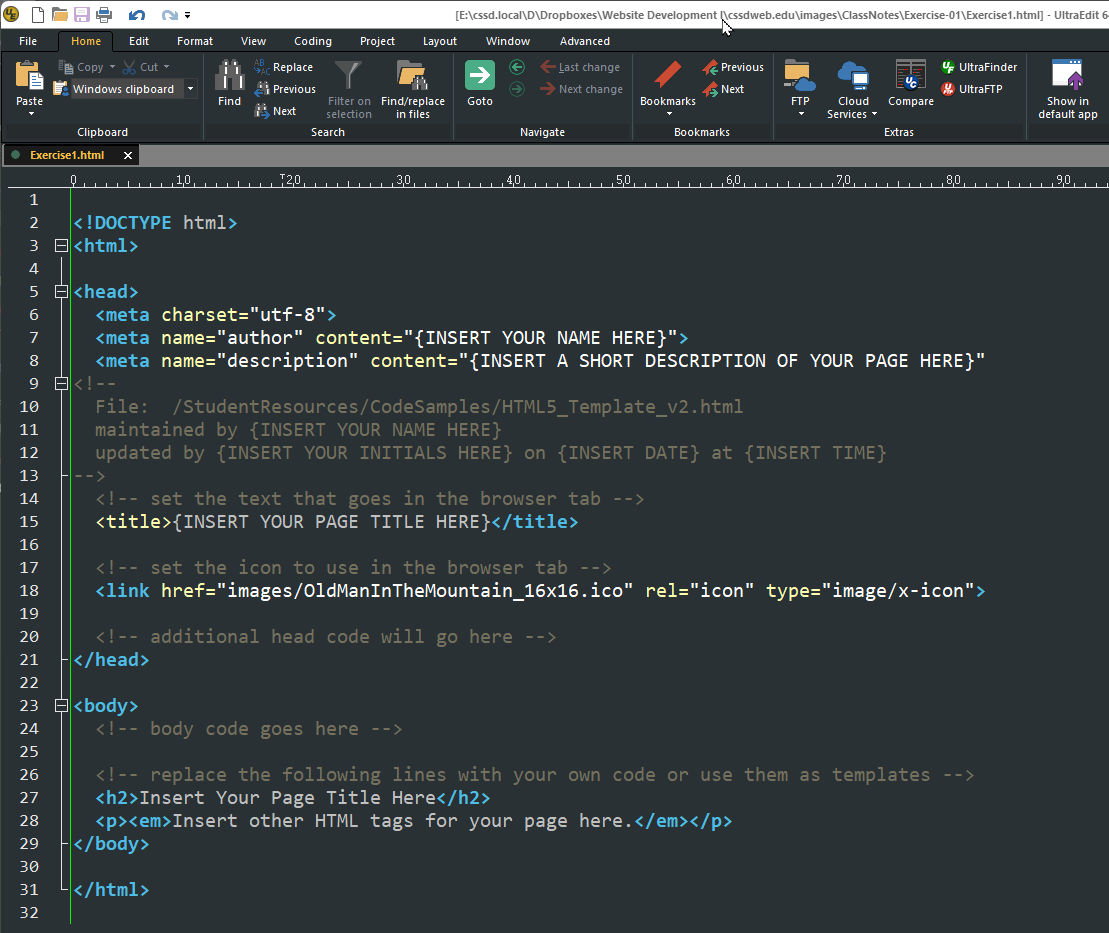
Exercise1.html. As before, be sure to include.htmlas the file extension. - You will know that you have saved the file correctly with a
.htmlextension because UltraEdit will now have added syntax highlighting to your code. If you do not see syntax highlighting, look at the tab label see the name of the file you saved. If it does not end in.html, save the the file again and make sure to type.htmlat the end of the file name. - You are now ready to begin modifying the HTML template and writing your own code to create your own web page.
- Replace all the text within curly brackets in the template file with appropriate text such as your own name, your initials, and the current date and time.
- Delete all the placeholder text between
the
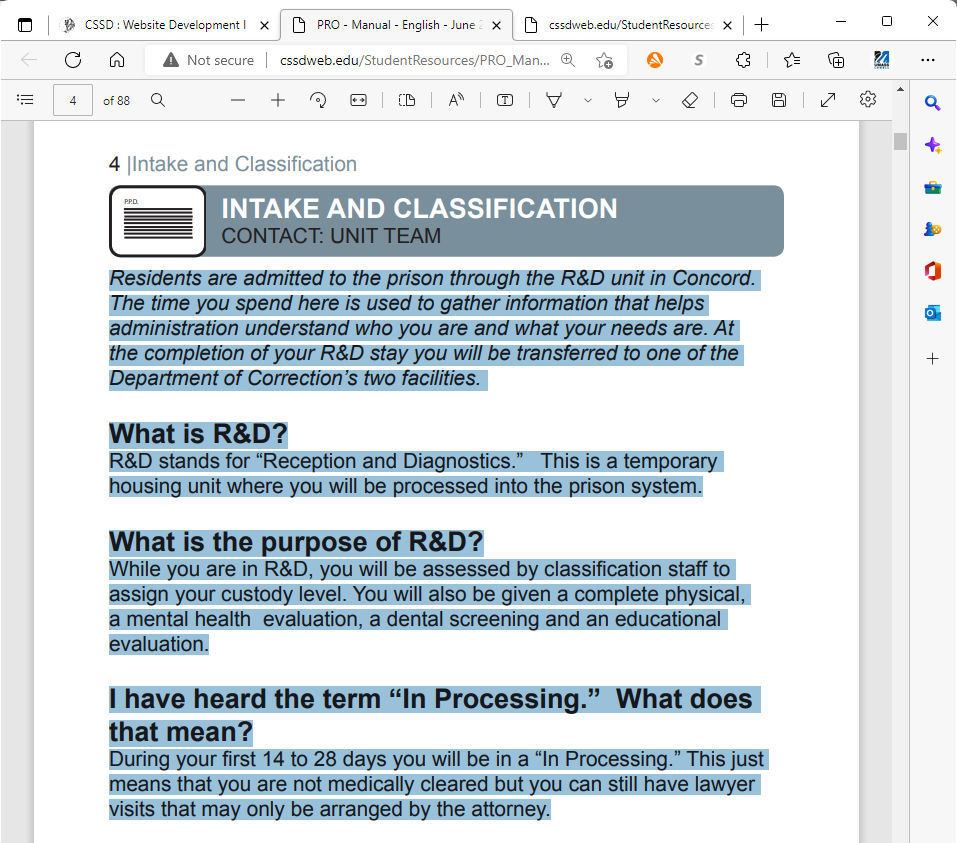
<body>and</body>tags to get ready to add your own code. - Open the PRO Manual and advance to page 4.
- Select the first few paragraphs by positioning your mouse to the left of the start of the text, holding down the left mouse button, and dragging to highlight the text as you see below.
- Type CtrlC to copy the text that you have highlighted.
- Return to UltraEdit and your HTML file. Click to position your mouse between
the
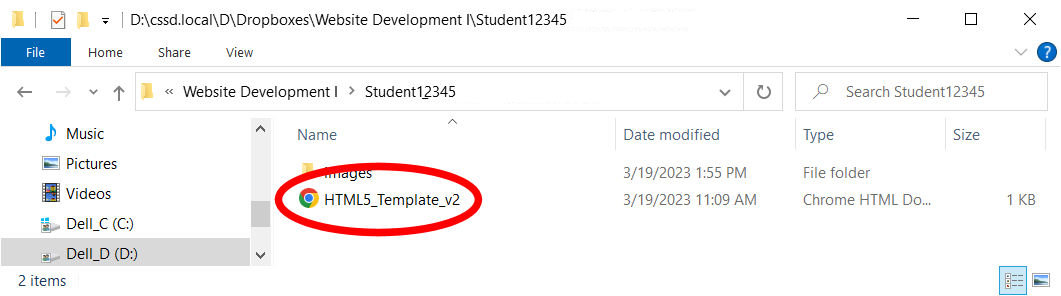
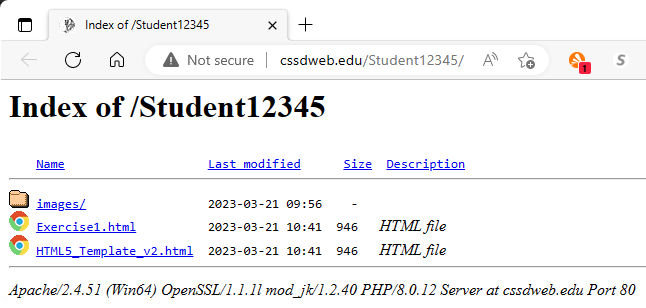
<body>and</body>tags and type CtrlV to paste in the text you copied from the PRO Manual. - Go to the page on our course website and click the link next to your name. You should then see a display similar to:
- Click the link for your HTML file (
Exercise1.htmlin the above example) to open your file in the browser and see the result of your work. You will see that the text you pasted in is completely unformatted and appears as a single paragraph. - Go back to UltraEdit and add
<h2>opening tags before each part of the text that should be a section title, such as:
- What is R&D?
- What is the purpose of R&D?
- I have heard the term “In Processing.” What does that mean?
</h2>closing tags after each section title. For example, the first section title should look like this:
<h2>What is R&D?</h2> - Experiment with adding other opening and closing
tags introduced by the textbook around various parts of the text to
make your page look more like it appears in the PRO Manual. Try:
<h1>...</h1>a large main heading
<h2>...</h2>a smaller main section heading
<h3>...</h3>a still smaller section heading
<p>...</p>- a paragraph
<blockquote>...</blockquote>an indented text division
<div>...</div>- a text division to be styled later
<strong>...<strong>- display the enclosed text in boldface
<em>...</em>- display the enclosed text in italics
<hr>- a horizontal line
- note that this is an exception to the opening/closing
tag rule because there is no closing
</hr>tag
- note that this is an exception to the opening/closing
tag rule because there is no closing
<br>- a
line
break- this is also an exception to the opening/closing tag
rule because there is no closing
</br>tag
- this is also an exception to the opening/closing tag
rule because there is no closing
- As you work, make note of the issues you run into and any questions you may have so that we can all discuss them at the beginning of our next class.
- Consider what’s different about your web page from what appears in the PRO Manual. These are the things that we will address in future classes.
Step 2: Load the HTML5 Template file into your editor
Step 3: Save your copy of the HTML5 template
Step 4: Update the documentation in your HTML file and delete the placeholder code
Step 5: Copy text from the PRO Manual into your HTML file
Step 6: Display your HTML file in Microsoft Edge
Step 7: Experiment with various HTML5 tags to format your HTML file
This is Class No. 1. It was last modified on
Saturday, October 21, 2023 at 4:38 PM. Copyright © 2010-2026 by Jesse M. Heines. All rights reserved, but may be freely copied or excerpted for
educational purposes with credit to the author.